Monday, September 26, 2011

Apple and Seckel Pear Cobbler


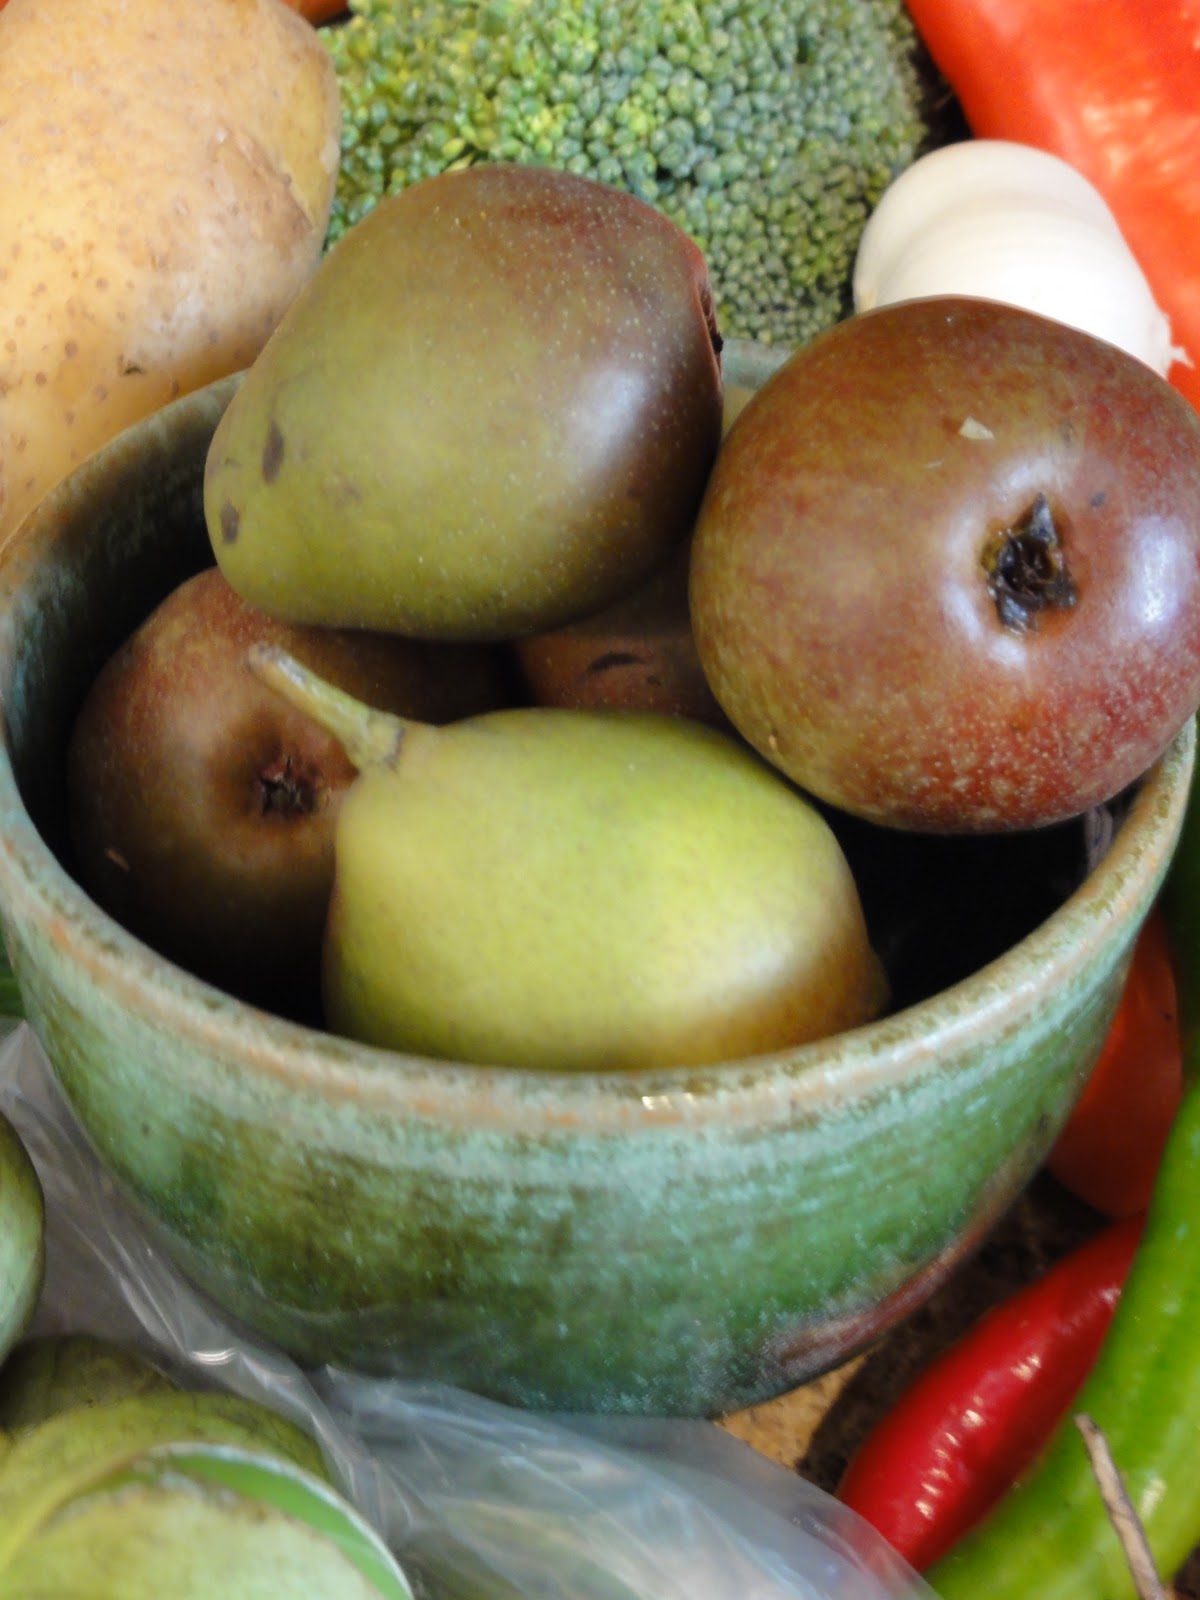
My bounty from the Farmer's Market this week!

It's been awhile since I was able to make my Sunday run.  I'm always amazed to see how much the markets can change from week to week. The beautiful red tomatoes and sweet yellow corn are slowly fading to make room for the crisp apples, hearty root vegetables and colorful mums.  It's kind of sad and yet exciting at the same time.  There's always something new to inspire me! 

I previously posted that I would write about a Peach Cobbler recipe but since apples and pears are more readily available now than peaches, I changed it up a little bit.

True confession time - I do have some peaches but have taken the selfish road.  I peeled and sliced them and put them in the freezer.  I am going to hoard them until winter when I just can't take it anymore and need the taste of some sunshine.  I love freezing summer produce and busting it out for a dessert, soup, stir fry in the middle of the snowy season when it looks like there is no end in sight.

But - the beautiful part of this recipe is that it can be taken from season to season and you can use whatever fruit is best at the time.  You can substitute peaches, plums, strawberries, blueberries, whatever you like.  The quantities and recipe stays the same.  

Since all fruit is different in size, you will want to have enough to equal 4 cups of fruit so use your judgement.

For the apples, I used Jersey Empire's since I'm so "Jersey" and they were on hand at the market, but you can use whatever apples you like best.  Granny Smith's add a nice tartness to this dish but you can use Rome, Gala, Cortland apples, etc. 

In case you are not familiar with them, Seckel Pears are much smaller than say a Bosc, Anjou or Bartlett Pear.  I like them because they have a great crunch and are super sweet.  Plus, they are just so damn cute! But, just like with the apples, use your favorite type of pear.


The orange in this recipe serves 2 purposes.  For one, the citrus helps to keep the apples from turning brown.  Secondly, it adds a nice freshness.  It gives it that "oh, wow, is that orange in there" unexpectedness that people, well, might not be expecting.  If you do not have an orange on hand, you can leave it out.  Also, if you are not using apples, the citrus is not needed to keep the fruit from turning.  You can always use the zest though for flavor.

Sticking with my whole theme of "making it your own", you can also change up the seasoning a bit in this recipe.  If you like nutmeg, go ahead and substitute 1/2 tsp for half of the cinnamon.  You could also use an allspice or a bit of ginger.  Even some fresh mint would be fabulous.  Have fun with it - be creative.

So - here is what you need:

5 Apples, peeled cored and sliced  (remember - total fruit = 4 cups)
5 Seckel Pears, peeled cored and sliced
1/2 orange (zest of 1/2 the orange and juice of 1/2 the orange)
1/2 cup firmly packed light brown sugar
1 Tbsp flour (this helps thicken the juices of the fruit when baking)
1 tsp cinnamon
pinch of salt

For topping:
1/3 cup flour
1/3 cup sugar
1/3 cup Old Fashioned Oats
pinch of salt
4 Tbsp cold butter cut into small pieces

Here is what you do:

Heat oven to 375 degrees.

Butter your baking dish.  You can use any type of baking dish - glass, metal, stoneware, round, square, oval.  You just need one big enough to fit the fruit filling.  Approximately a 9x9 size.

In a large bowl, mix together your apple and pear slices, the zest from 1/2 orange (approximately a teaspoon or so), the juice from 1/2 orange, the light brown sugar, flour, cinnamon and the pinch of salt. 


In a separate small bowl, combine the flour, sugar, oats and pinch of salt for the topping.


Using a pastry blender, 2 forks or those good old fashioned tools I refer to as hands, cut the butter into the flour mixture just until combined.  Don't work it too much or the butter will get too melty.  Should look a little like this........


Pour fruit mixture into prepared pan.
  

Top with crumb mixture and bake. 
  

The cobbler should take about 30-35 minutes but keep checking on it.  You want the topping to get nice and browned but you don't want to overcook the fruit too much. 

Let the cobbler cool a few minutes.  This will give the juices a chance to set and thicken a little. 

I know - it's so hard to wait and not stick that spoon right in.  But be patient.  No good can come out of eating that piping hot cobbler right out of the oven.  That's when bad things happen to good people.

I like to top mine with some ice cream or fresh whipped cream but that's your call.  But, I have to tell you, there is nothing like that taste of the ice cold creamy ice cream with the warm crunchy crumb topping and gooey soft warm baked fruit. I didn't have vanilla on hand so I used Blue Bunny coffee break ice cream.  OMG!  So good!  It's like having your coffee and dessert rolled into one.


 So, remember - any combination of fruit - apples and cranberries, mixed berries, peach and plum with fresh mint - use what is in season, use what's on hand and most importantly - use what you like.

Use your creative side.  And if you come up with something really amazing - please share it with me.  I would love to hear about it.

Happy Fall & Happy Baking!


Tuesday, September 13, 2011

Sweet Potato and Black Bean Chili

I wasn't able to make it to my Farmer's Market this weekend.  Sadness.

But, it's probably a good thing because I still had a whole mess of produce from last week that I needed to do something with.

So, I decided to make chili.  I love vegetable chili.  It is hearty, yet light at the same time and so full of flavor.  Now, remember, you can change this up anyway you like.  I used sweet potatoes since I had them on hand, but if you prefer a Yukon Gold, Red Bliss, etc., feel free to use them. 

I used black beans in the chili since I had them on hand but, if you prefer red kidney beans, rock them out.  I know I'm getting repetitive here but remember - make it your own.

Another option - throw in some meat.  You can add sliced or ground chicken, ground beef, shredded beef or pork or you can top it with some chopped bacon - which I did for Mike - my man is all about the meat!

Here is what you need:


2-3 cloves minced garlic
1 small chopped onion
4 cups diced sweet potatoes
1 cup diced carrots
1 cup diced celery
1 cup diced red pepper (or green or yellow - your choice)
1 small diced serrano or jalapeno pepper
1 14 1/2 oz can petite diced tomatoes w/juice
1/2 cup beer
2 Tbsp chili powder
1 tsp cumin
1 tsp smoked paprika
1 tsp unsweetened cocoa power
salt and pepper to taste
1 cup corn kernels (canned or fresh from the cob)
1 14 1/2 oz can rinsed and drained black beans
1/2 cup chopped cilantro

Optional garnishes:

sour cream
cheddar or monterey jack cheese
sliced jalapenos
guacamole
chopped cilantro
sliced radishes
sliced peppers

Here is what you do:

In a large (12 inch) saute pan or stock pot, heat olive oil and add garlic and onions.  Cook for about 2-3 minutes or until onions begin to soften. 

Add sweet potatoes, carrots, celery and peppers and cook approximately 8-10 minutes.


Add the 1/2 cup of beer to the pan.

Drink the rest of the bottle of beer.

Then add diced tomatoes, chili powder, cumin, paprika, cocoa powder and salt and pepper.  If you would like your chili a little spicier, you can add some crushed red pepper here as well.  Continue to cook until chili begins to simmer.

Add corn, black beans and cilantro and cook until heated through or until vegetables are to your desired consistency.  I like my veggies a little al dente but it's your kitchen so cook them as long as you want.

Here is what mine looked like:


I added some grated cheddar cheese, a bit of sour cream, some sliced radishes and a sprinkling of cilantro.  Get creative with your garnishes and make it look pretty.  Remember - everyone eats with their eyes before they eat with their mouths.

You can serve this with some tortilla chips, fritos or my favorite - cornbread.


I used a basic cornbread recipe that was printed right on the back of the corn meal mix.  This is another great place to get creative.  Corn bread is like a blank slate that you can fill up with chopped jalapenos, a couple handfuls of grated cheese, some extra spices and so much more.

This chili is even better the next day when the flavors have had more time to meld together.  The leftovers make a great topping for nachos, stuffed into quesadillas or topped on a baked potato.

I love a dish that you can make once and reinvent the next day!

Happy cooking!!


Saturday, September 3, 2011

Turkey Tacos

I love tacos!  

They are a great meal all on their own or can be an awesome way to utilize leftovers .  You can make them the same every time or you can change it up and be different.  It's a great dish to be creative with.  All it takes is a little prep.  Tacos are also a great weeknight meal because everything can be made ahead of time and then reheated right before serving.

Here is how it goes in my house but please - feel free to change it up depending on what you like. 


We've got:

Just over a pound of ground turkey. I like to use turkey because it is a leaner cut of meat and has great flavor.  But feel free to use ground beef or ground chicken.  You could even substitute shredded beef, chicken or even use roasted veggies.  It's your kitchen - do what you like best.
2 cloves minced garlic
1 minced or finely chopped carrot (adds a natural sweetness)
1/2 minced red onion - or whatever type of onion you like
2 Tbsp taco seasoning (see below)
1/2 minced jalapeno pepper - if you don't like it too spicy - omit - if you like it spicier - add more
2 Tbsp chopped cilantro - again - omit if you don't like or add more if you do.

Taco Seasoning:
1 tsp chili powder
1 tsp paprika
1/2 tsp cumin
1/8 tsp cayenne pepper
1/2 tsp salt
1/2 tsp pepper

Most homemade taco seasonings would call for an addition of garlic and/or onion powder but since I am using fresh garlic and onion, I omit them in my seasoning.  This recipe can certainly be doubled or tripled so you can keep it on hand to use in fajitas, soups, etc.  

Then as your accompaniments:


We've got both hard and soft tortilla shells.

Then for toppings, shredded and sliced cheese (makes less mess for the kids), chopped tomatoes, chopped lettuce, sliced radishes and wedged limes.  I also like to put out sour cream, fresh salsa, maybe some guacamole - but I forgot to take a picture of them! 

Again, this is the part where you can get creative and use some other veggies or condiments you may have on hand.

So, now what do I do?  Here it is:


In a large saute pan cook your ground turkey (or other meat) until it is browned.  Add your carrot, jalapeno, onion and garlic and saute about 3-4 minutes.

Next, add your taco seasoning and if needed some water.  Depending on how juicy your meat is, add about 1/4 cup of water at a time until the meat and sauce is the consistency you like.

Cook another minute or until heated through.  Stir in the cilantro and you are good to go.


Here is what my assembled taco looked like:


Top photo is the hard shell version and bottom is in a soft flour tortilla.

And of course, what goes better with tacos than a margarita!


Well, I guess you could argue that an icy cold beer could go with the tacos just as well - or some nice fruity sangria.  Again, it's your kitchen so serve what you like and make it your own.  

On a side note - I'll be back at the farmers market tomorrow (couldn't make it last week due to Hurricane Irene) - so I promise to post the smashed potato pie and peach cobbler recipes that were requested this week.

As always, thanks for joining me!

Monday, August 15, 2011

Cocktail Time

My cousin Kathy was up this weekend from Texas to celebrate her son's Acceptance to West Point.  VERY exciting!! Congratulations again Nick!!

We spent the day with him on Saturday for the parade and then she had a little one on one time with him on Sunday.  To celebrate when she got back, this is the cocktail I had waiting for her.


It's kind of a mash up between a Mojito and a Martini.  If Mr. Mojito and Mrs. Martini had a baby, this is what it would be.

If you are like my husband and you need a name for everything - you could call it a Mar-jito (marheeto).  Hey, that's kind of cute!

Here is what you need:

2 oz. Vodka
1 oz. Triple Sec
Juice of 1/2 lime
Fresh Mint - about a small palmful or as much as you like- torn into pieces
1/2 Tsp. Sugar
Seltzer - approximately 3 oz
Ice

Here is what you do:

In a cocktail shaker, combine vodka, triple sec, lime juice, mint, sugar and ice.  (Normally I would tell you to muddle the mint but as long as you shake the heck out of it, it's all good.) Shake vigorously to combine ingredients and then strain into a chilled martini glass.  Top with seltzer and garnish with mint leaf or slice of lime.  Or just drink up without a garnish.  Your choice.  

If you want to get fancy, you could also create a sugar rim by rubbing the lip of the glass with a lime wedge and then dip it into a mixture of lime zest and sugar.  Yum!   

Now, you know how I always encourage you to "wing it" or "make it your own?"  This drink can easily be substituted with any number of ingredients.  If you don't have vodka on hand - use rum. No triple sec - no problem - leave it out - or substitute some orange liqueur or even a little OJ.  No lime juice on hand - use lemon or even orange juice for that matter.  No mint - use basil - or rosemary.  There are so many great fresh herbs this time of year - experiment with them!

Don't be afraid to try something new - with your food or with your drink.  Especially with drinks.  There's alcohol in there.  What's the worst that could happen - it doesn't taste great so you kick it back.  Come on - we've all had a shot or two in our day that gave us the skeeve chills but we still managed to consume several of them with friends on a Friday night!

Oh, and in case you are wondering, yes, I did make it to the farmers market on Sunday morning - in the torrential rain.  I got very wet but still went out to support my farmers!  Here's what I got............


I used the peaches for a cobbler, the potatoes and some of the rosemary, garlic and onion for a smashed potato pie, the radishes and tomatoes in a salad with the wild arugala, the corn we just relished right on the cob.  When you have good produce, the possibilities are endless!  The strawberries could also be used in that Mar-jito as well.  They would add a natural sweetness to the drink so you wouldn't even need the sugar. 

If you would like to see the recipes I just mentioned, leave me a comment and I'll be sure to post them.

Until then, Cheers!  


Monday, August 8, 2011

Grilled Rainbow Chard Pizza

It was another Sunday morning at the Farmers Market.

Here is what I brought home this week.........................


There's wild arugala, garlic, onion, garlic scapes, potatoes, carrots, golden beets, 2 different types of squash, mushrooms and crusty bread.  There is also some rainbow chard and fresh & smoked mozzarella - which brings us to our dish for today.

Grilled Rainbow Chard Pizza.  So yum!

For those of you who may not be familiar with Rainbow Chard (also known as Swiss Chard) is a leafy slightly bitter green vegetable that is a descendant of the beet family.  The stems can range in color from green to white to yellow to red.  Not exactly all the colors of the rainbow but you get the idea.  Chard is very popular in Mediterranean cooking and the first varieties can be traced back to Sicily.

Chard can be used in so many different ways - it can be sauteed with garlic and olive oil as a side dish, steamed, in pasta dishes, egg dishes, quiches, fritattas, stews, soups, you name it.  Think of using it like you would spinach.

So here is what you need to make the pizza..................

1 store bought pizza dough (or be adventurous and make your own - or pick one up from your favorite pizza place)
4 slices thick cut bacon, chopped
1/2 thinly sliced onion
1 large clove of garlic, thinly sliced
Bunch of rainbow chard, rough chopped (mine was about 8 cups worth before cooking)
1 1/2 cups ricotta cheese
Sliced smoked mozzarella cheese (approximately 1 small ball)
Salt & Pepper
Shaved Pecorino Romano or Parmesan Cheese (optional)
Red Pepper (optional)

Here is what you do................

Go outside and get your grill nice and heated on a medium heat.

Go back to your kitchen and in a large skillet over medium high heat, saute bacon pieces until nice and crispy.  Leave oil in pan but remove bacon to a small bowl and hold until you are ready to assemble your pizza.

To the bacon grease add your sliced onion and saute approximately a minute, add your garlic and cook another minute.  Throw in your chopped chard and cook just until the leaves start to get wilted.  Season with salt & pepper and red pepper if you like.  Remove from heat.


Pack up your mise en place (fancy French term for all the stuff you need - in other words, all your ingredients) onto a tray and head back outside.

Stretch out your pizza dough onto a large platter or cutting board, like so:


Spritz or brush the dough with olive oil so it doesn't stick to the grill grates.  Probably wouldn't be a bad idea to oil the grill grates a little also.  This can be easily done with a paper towel with some olive oil on it and a pair of tongs.

Place your dough on the grill and close the lid.  Be very careful to keep an eye on it.  The dough cooks quick.  I check it a minute at a time.  When the dough gets nice grill marks on the bottom, carefully brush with a little more oil and flip your dough over.  Once again, cook a minute at a time.


Remove dough to cutting board again and top with ricotta, cooked chard mixture, crispy bacon bits then then finally the sliced smoked mozzarella. 

Carefully slide back onto the grill and cook for just a minute until the cheese starts to get melty.


Oh, heaven on a plate!

Add some grated or shaved pecorino romano or parmesan cheese, a little more fresh ground pepper and you are good to go!

Here is what she looks like sliced and ready to serve.  This is probably going to need a fork and a knife!


Now, if you are an apartment dweller and/or do not have access to an outdoor grill, feel free to make this on a stove top grill pan or even do it in the oven.  If you do decide to bake it, remember to prebake the crust before you put your toppings on. 

There are so many different variations you can make with this pizza, if you don't like bacon, leave it off.  If you have leftover roasted chicken or steak, chop it up and throw that on instead.  If you don't like or don't have access to fresh chard, feel free to substitute spinach.  Remember, like I always say, "Make it your own".

Happy Cooking!!


Tuesday, August 2, 2011

Squash Blossoms & Tomatillos & Garlic Scapes, oh my!!

Here is the recipe for the Quesadillas that I promised in my previous blog.  In case you missed it, I talked about all the wonderful produce from my visit to the Farmers Market on Sunday.

First a little tutorial on the 3 ingredients.

Let's start with the squash blossoms.

When I have mentioned squash blossoms in conversation, I typically get one of two reactions:

1-Ooooh, I LOVE squash blossoms, where did you find them?

or

2-Huh, what's a squash blossom?

For those of you who can relate to answer #1, read on for the recipe and for those who can relate to answer #2:

Squash blossoms are these beautiful flowers that are very versatile and can be used in so many different ways.  You can eat them raw, stuff them with a simple cheese filling and bread and fry them, use them in a frittata, in a soup, with pasta, the possibilities are endless. 

  
Do not let them initimidate you - you are much bigger than they are.

Be forewarned, however, they will spoil very quickly.  My suggestion is to make and eat them the day you purchase them.  If not, within 24 hours at latest.

Next up - tomatillos (pronounced tah-MAH-tee-oh).

Same scenario:

1-I LOVE tomatillos!

or

2-What the heck is a tomatillo?

Well, I'll tell you - or better yet show you.  Here they are:


Tomatillos have also been referred to as a Mexican tomato.  Again, another versatile ingredient.  These can be used in salsas, quesadillas, with roasts, stews, sauces, eaten raw, roasted, grilled, etc. They have a slightly tart taste to them. 

Before using a tomatillo, you will want to peel off their papery husks and give them a quick rinse since they can be slightly sticky.

Last but certainly not least - garlic scapes.

1-Garlic scape - what's a garlic scape?

That's about it.  The only reaction I usually get.

Garlic scapes are the flowering tops that grow up and out of hardneck garlic.  They taste just like garlic but are a little sweeter and milder than say, a clove of garlic. I know I am repeating myself, but again, this is another ingredient that can be used in so many ways.  They can be eated raw, sauteed, on top of pizza, in a vinaigrette for a salad dressing, in omelets, chopped into salads, in pasta, risotto, should I go on?


Store these after purchase or after harvesting in the produce drawer of your refrigerator and use within a few days.

So, there's my mini lesson on some of my farm market finds.  Here is a recipe for one of the meals I made when I brought them home.  Remember - feel free to make it your own.  If there is an ingredient you really don't like or would like to substitute - go for it.  I promise, the food police will not come knocking down your door.

Squash Blossom and Garlic Scape Quesadillas

1 garlic scape sliced thin
1/2 thinly sliced red or white onion
1 jalapeno pepper, diced
2 ears of fresh corn, corn removed from cob (approximately 1-1 1/2 cups)
1/4 cup chicken broth
1 bag of squash blossoms (there were about 20 in my bag, varying in size), cleaned and stemmed
1/2 cup cilantro, chopped
tortillas - honey wheat, flour, whatever your choice is
cheese - again, your choice depending on your taste - cheddar, monterey jack, queso blanco
sour cream (optional)
diced tomato (optional)
tomatillo salsa (recipe follows)

Heat saute pan and swirl in about 2 Tbsp olive oil.  Add garlic scapes, onion, jalapeno and corn.  Saute until onion begins to slightly wilt.  Add chicken broth and squash blossoms and heat for a minute or two until blossoms begin to soften. Add cilantro and remove from heat.  Season with salt and pepper.

In another skillet, heat tortilla on one side.  Turn it over and add a handful of cheese and a scoop or two to cover 1/2 of the quesadilla.  Add a little more cheese and fold the tortilla over.  Cook for a minute, then flip over to melt the cheese on the other side.  Remove quesadilla from pan and repeat as necessary.


Serve with tomatillo salso and sour cream.  I also like to add some chopped fresh tomato but that's up to you.

Here is what she looks like - so pretty! 


And now, the Tomatillo Salsa..............

1 basket of tomatillos - mine had a lucky 13 - husked and rinsed
1 red onion, cut into quarters
3 cloves of garlic, peeled
1 jalapeno pepper, optional
1/2 cup cilantro
salt and pepper

Preheat broiler.  On a broiler safe baking sheet, place tomatillos, onion and garlic and if using, the jalapeno pepper.  Like this:


Broil for approximately 8 minutes, periodically checking and turning over as necessary.

Let sit until cool enough to handle.

In a blender or food processor, add veggies and pulse until everything is nice and chopped. Throw in cilantro and pulse one more time to combine.  Adjust your seasoning with salt and pepper and that's it!  You're done! Yay!!


This is a great substitute for a regular salsa with chips or can be used as a condiment, sauce, etc.


Hope you enjoyed these recipes and it will inspire you to get out there and try one of these fabulous ingredients. Don't be intimidated - what's the worst thing that could happen - maybe you'll learn something or have a new favorite ingredient.  Even if it does not go your way, lesson learned.  To me, a successful day is when I learn something new - whether it be good or bad. 

Happy cooking!

Monday, August 1, 2011

Red & Blue Oatmeal Bars

It was another Sunday morning at the Ramsey Farmers Market.  Here is what I got:


After my produce and I had this little photo shoot, we had lots of fun slicing, dicing, blending, chopping, baking -  you name it.  I spent the better part of the day concocting all sorts of yumminess from these beautiful ingredients.

Check out the flowers - ain't they gorgeous? And how about those beautiful squash blossoms and purple basil?  I also bought garlic ramps, tomatillos, tomatoes, potatoes, Italian hot and cherry peppers, a nice crusty Semolina bread, fresh mozzarella and look at the color on these purple scallions........ 


They would be beautiful in a salad, stir fry, vinaigrette, just about anything.  Not sure what I am going to do with them yet but I couldn't pass them up.  I'll keep you posted on that one.

The first recipe I will share with you from my bounty is Red and Blue Oatmeal Bars.  Most of the ingredients you will probably have on hand and don't need to head to the Farmers Market for but I like to use the jam from The Jam Man!  Otherwise, any type you may have in the fridge would be just fine.

These bars have the perfect mix of sweet, salty and crunchy from the butter and oatmeal and smooth and silky from the jam.

Here is what you need:

1 1/4 cups flour
1/2 tsp baking soda
1/2 tsp salt
1 tsp ground cinnamon
1/2 cup or 1 stick unsalted butter, softened (if using salted butter, cut the salt down to 1/4 tsp)
1/2 cup sugar
1 large egg
1 tsp vanilla extract
2 cups old fashioned rolled oats
1 cup red & blue jam (this is the jam I purchased from the market which is raspberry & blueberry mixed.  You can substitute any type of jam you have on hand or whichever is your favorite.)

Here is what you do:

Preheat your oven to 350 degrees.  Coat a 9 inch spare baking pan with cooking spray or butter and flour the pan.

In a small bowl, sift together the flour, baking soda, salt and cinnamon.

In a standing mixer or another bowl, cream together the butter and sugar.  Beat in the egg and vanilla extract until combined.  Add the flour mixture and mix just until combined.  Stir in 1 3/4 cup oats.

Spread 2/3 of the batter into prepared pan.  Spoon jam over batter.


Mix remaining 1/4 cup of oats into reserved 1/3 cup of batter.  With fingers crumble batter over top of jam. 

Bake for approximately 30 minutes until golden brown.  (mine took precisely 32 minutes)

Let cool in pan and then cut into bars.


You can leave the bars in the pan and cover with saran wrap to store them.  I prefer to take them out so the easiest way to do that was to cut into 4 sections and transfer onto a dish with a spatula like so........


Doing it this way makes it easier to cut the bars into smaller servings.  But, again, that's your choice.


Sorry if this picture is a little blurry - I was shaking at the anticipation of eating it! Pure decadence!

These bars would also be great served warm with a scoop of vanilla ice cream or whipped cream on top.  They also pack and travel well so they are a terrific dessert to take along on a picnic, to the beach, on vacation, wherever.

Next recipe that will follow - later today or tomorrow - Squash Blossom Quesadillas with a Tomatillo Salsa!

Thursday, July 28, 2011

Farm Market Inspiration

I have to start by apologizing.

I'm an irresponsible blogger.  I have been completely negligent.

I have not written anything since May 4th.  I don't know where the time went.  I could reasonable justify my lack of writing on the end of the year school madness (as any Mom with school age children can testify to), or the fact that I was busy with work, or I could use the whole "my husband was in Germany for a whole month" excuse.  He actually was away for an entire month.  But, still, these are not good excuses. 

But alas, I am back.  And inspired.  And I promise not to wait so long in between posts again.  And if you are local and do not hear from me in a couple of days, come and knock on my door.

Since my last writing, the Farmer's Markets have opened in New Jersey providing unlimited amounts of inspiration, fresh produce, fresh meats, herbs, homemade pickles and and so much more depending on which markets you shop at.

If you are in New Jersey, you can go to http://www.jerseyfresh.nj.gov/ to find a farm market in your area.  This website also provides tips on choosing fresh produce, recipes, events, etc.

If you have read some of my other blog entries, you know I am a big fan of shopping with local merchants as well as local farms and businesses.  As I have said before, support your neighbors.

My favorite weekend market is the Ramsey Farmers Market held on Sundays from 9-2.  Their website is http://www.ramseyfarmersmarket.org/.  They not only have the best fresh organic and non organic produce but there are bakeries and vendors who sell olive oils and vinegars, spices, fresh flowers, pies, wine, fresh bread, pizzas, wines and even dog biscuits.  Did I mention they have wine? And you wonder why Ramsey is my favorite market? There are usually crafts for kids, live music and even chef demonstrations.  It's a great way to spend the morning/afternoon and plan your menu for the next few days or even the week.  Check out their website for more details.

Here is what I brought home one morning last month:


Isn't that a pretty picture?

Yes, this is what I do - I line up my produce for photo shoots.  This is why I haven't had time to write my blog.

Red leaf lettuce, fresh peas, broccoli, cucumbers, blueberries, strawberries, carrots, spices, blood orange balsamic vinaigrette, fresh apple cider donuts and of course, wine!  Did you seriously expect me to shop where I couldn't pick up a bottle? Then there are tomatoes, potatoes, garlic and onions.  Four staples in my kitchen.

Are you drooling yet?

Seriously, though, the farm market is so inspiring to me.  I just look at this pile of stuff and want to start slicing dicing and cooking my little heart out!  Here are a couple of dishes I made with what you see here.


A monster salad with the fresh greens, yellow and red tomatoes, baby balls of mozzarella, carrots and olives all drizzled with a bit of the blood orange balsamic vinegar.  Throw in a splash of good olive oil, salt and pepper and dinner is served.  It really is that easy!


Cavatelli and Broccoli.  Okay, for this one, I went to the freezer for the cavatelli and the pantry for the chicken stock and white wine.  The broccoli, onion, garlic and parmesan were from the market.  Basically, what you do is boil your cavatelli or whatever pasta you choose. Cook until just al dente.  In the meantime, finely chop your garlic and onion and saute in some olive oil until the onion starts to get wilted and lightly translucent.  Throw in a splash of white wine.  Cook for 1 minute.  Add approx 2 cups chicken stock and cook until the liquid starts to simmer.  Add your broccoli and cook just until your broccoli gets tender and is a vibrant green.  You don't want to overcook the broccoli or it gets bitter and wilted.  Yuck!  Add some salt and pepper to taste and about 2 Tbsp butter to add a little richness.  Toss in your cooked pasta and add some parmesan cheese and red pepper if you like a little spice.   You cannot go wrong with this dish.


Mozzarella, roasted yellow and orange pepper, basil and tomato salad.  This is a dish my husband and I live on all summer.  I roasted the peppers on the grill until the skin turned black.  Then let cool, peel, core, seed and slice the peppers.  Layer all the ingredients and top with a splash of balsamic vinegar.  You don't need to do much else - these ingredients are good enough to stand on their own.  Don't fuss with them.  And remember - make it look pretty.  We all eat with our eyes before we eat with our mouths! A loaf of crusty bread and a crisp white wine and you are in business.

I totally encourage you to get out there and give your local farmers some support.  Even if you start small and purchase a couple of tomatoes at first.  If there are ingredients you don't know about, ask the people working the stands.  The farmers grow this stuff - they know what to do with it and will surely be happy to share their ideas with you.  Or, you can always call/write/email me.  I'd be happy to share some recipes with you.

In the meantime, I promise to write more frequently - it won't be everyday.  That I can guarrantee. Maybe I'll go to Ramsey this weekend and pick the strangest or most uncommon ingredient I can find and share it with you. 

Thanks to everyone who has encouraged me to get back to the computer.  Tune in soon.  I promise not to disappoint.

Wednesday, May 4, 2011

Chicken Enchilada Ring

I volunteered to make something for the Teacher’s Appreciation Day luncheon at school today.  Since tomorrow is Cinco de Mayo, I thought I would tie in a little Mexican theme and make a Chicken Enchilada Ring.

This is a fabulous recipe that is from The Pampered Chef but as I always do, I tweaked it a little and made it my own. This is also one of those great dishes where you can make good use of leftovers and what you have on hand.  The chicken you can make fresh or use some leftover grilled or rotisserie chicken.  You can eliminate the spicy and add some lemon zest and fresh herbs.  You can make it vegetarian and just use vegetables. You can make it with ½ chicken and ½ broccoli, spinach or a mix of vegetables.  You could also substitute the chicken for ground beef or turkey and make a taco ring. There are so many possibilities.  Just use the “basics” of 2 cups filling, ½ cup mayo and 1 cup of shredded cheese.  The combinations are endless. Use what you have on hand.  

Here is what you need:

2 cups coarsely chopped cooked chicken
1/2 cup (2 oz.) shredded Cheddar Cheese
1/2 cup (2 oz.) shredded Monterey Jack Cheese
1 can (4 oz.) chopped green chilies, undrained
1/2 cup mayonnaise
1 Tbsp Southwestern Seasoning Mix
2 plum tomatoes
1 lime
1 garlic clove, minced
1 Tbsp chopped fresh cilantro
2/3 cup tortilla chips
2 pkgs. (8 oz. each) crescent rolls
1 cup salsa
1 cup sour cream


Here is what you do:

Preheat your oven to 375 degrees.

Take your chopped chicken and put it in a large mixing bowl.  Easy enough right?


Wow, that picture is dark - sorry! It's just chicken though.

Take your shredded cheeses, green chilies, mayonnaise and southwest seasoning and add it to your chicken.  Mix well. 


On a side note – I like to use block cheese that I shred myself.  If you want to use the bags of preshredded cheese that you can buy in the supermarket – then go ahead.  It’s your time, money, kitchen and recipe.  Do what’s best for you.  The reason, though, that I like to shred it myself, is because the bagged cheese will usually have an anticlumping agent in it, such as flour.  The cheese will melt but it won’t have that ooey gooey melting consistency that the fresh shredded cheese will have.  Plus, I prefer not to have added ingredients in my cheese.


See how much lighter and fluffier this cheese looks?

Next, take one of your tomatoes and core, seed and chop it and add it to your chicken mixture.  I like to use plum tomatoes here because they are meatier and have less juice and seeds then say, a beefsteak tomato.  But, if all you have on hand is a vine ripened or other tomato, then that is fine as well.  Just wing it – it’s what I always do.


Chop your cilantro and throw it in the bowl along with your minced garlic.  Cut your lime in half and juice one half of the lime into the bowl.  The recipe calls for 1 tsp but again, just juice it right in.  Don’t try squeezing the lime into a measuring spoon.  It will be a big mess – I promise you! 


Next comes a fun part.  If you have children helping you cook, this would be a good step for them.  Put the tortilla chips into a Ziploc bag and scoosh out all the air.  Seal it well.  With a rolling pin, meat tenderizer, hammer, etc., crush the chips.  This makes great use of those leftover tortilla chips that are sitting at the bottom of the bag that are basically pre-crushed for you anyway.  Check your pantry closet; you probably have a bag in there.


Add ½ of the chips to the chicken mixture and stir it up.

Next comes the “ring” part.  Don’t be scared.  It’s really quite easy.

On a large round baking stone, sheet tray, whatever you are baking with, sprinkle the rest of the crushed tortilla chips.  Like so:


Open up your 2 crescent roll dough packages and separate them into triangles.  Place one in the 12 o’clock, 3 o’clock, 6 o’clock and 9 o’clock positions.  Like so:


See – that wasn’t too bad.

Next, start to fill in your open spots 4 at a time.  Here is what it looks like:


Now, this doesn’t have to be neat or look perfect at all.  It is all going to get wrapped up into a little package anyway.  It should look like a sunburst.

Once all your crescents are laid out, press or roll them down so the dough is even.  You just want to flatten it out and adhere it all together so it will hold the filling and cook evenly.  As you can see, I used my fingertips – it’s how I do things.  The less I have to wash, the better. 


We’re almost done.  Take your chicken mixture and shlop it all into the middle of the dough.  Again, it doesn’t have to look pretty; it’s all getting folded up.  If you feel you must, you can use a large scoop and make nice little neat chicken mounds in the middle.  This is what it should look like.


Start with your points and fold them up and over the chicken mix into the middle of the ring and tuck the points under.  Like this:


Again, this doesn’t have to be neat.  It looks better when some of the chicken filling is showing.  Plus, there will not be enough to fully cover it.  This also leaves you some garnishing opportunities.

Here is what it looks like all folded up and in a neatish ring.


At this point, if you want to be creative, you can shape the ring into a heart. 


This is fun for Valentines Day or just because.  I have also done this at Halloween and make the ring into a coiled snake using olives for eyes and a roasted pepper sticking out of its mouth as a tongue.  It was kind of cool, too since the tortilla chips made the snake look like he was shedding his skin.  Appeals to the morbid/semi gross part of me.  You have to have fun with your food!

If you still have some leftover tortilla chips or there is some floating around on your baking sheet, scoop it up and sprinkle it over the top.  Put it in the oven for about 20-25 minutes or until the crescents are nicely browned.

While the chicken is in the oven, take your remaining tomato and lime half and slice them for garnish.  Like this:


When ring is done baking, garnish with the tomatoes and limes and this is what you get:


Ain’t she pretty?  Here she is all ready to serve with the sour cream and salsa in the middle.


So, next time you’re looking to “re-invent” your leftovers or make something new, give it a try.  And be sure to let me know what you did.  E-mail me with ideas, pictures, recipes; I would love to hear from you!

Oh, and since its Teacher Appreciation Week – go appreciate a teacher in some way.  I’m sure even a simple thank you note would make their day.