Wednesday, May 4, 2011

Chicken Enchilada Ring

I volunteered to make something for the Teacher’s Appreciation Day luncheon at school today.  Since tomorrow is Cinco de Mayo, I thought I would tie in a little Mexican theme and make a Chicken Enchilada Ring.

This is a fabulous recipe that is from The Pampered Chef but as I always do, I tweaked it a little and made it my own. This is also one of those great dishes where you can make good use of leftovers and what you have on hand.  The chicken you can make fresh or use some leftover grilled or rotisserie chicken.  You can eliminate the spicy and add some lemon zest and fresh herbs.  You can make it vegetarian and just use vegetables. You can make it with ½ chicken and ½ broccoli, spinach or a mix of vegetables.  You could also substitute the chicken for ground beef or turkey and make a taco ring. There are so many possibilities.  Just use the “basics” of 2 cups filling, ½ cup mayo and 1 cup of shredded cheese.  The combinations are endless. Use what you have on hand.  

Here is what you need:

2 cups coarsely chopped cooked chicken
1/2 cup (2 oz.) shredded Cheddar Cheese
1/2 cup (2 oz.) shredded Monterey Jack Cheese
1 can (4 oz.) chopped green chilies, undrained
1/2 cup mayonnaise
1 Tbsp Southwestern Seasoning Mix
2 plum tomatoes
1 lime
1 garlic clove, minced
1 Tbsp chopped fresh cilantro
2/3 cup tortilla chips
2 pkgs. (8 oz. each) crescent rolls
1 cup salsa
1 cup sour cream


Here is what you do:

Preheat your oven to 375 degrees.

Take your chopped chicken and put it in a large mixing bowl.  Easy enough right?


Wow, that picture is dark - sorry! It's just chicken though.

Take your shredded cheeses, green chilies, mayonnaise and southwest seasoning and add it to your chicken.  Mix well. 


On a side note – I like to use block cheese that I shred myself.  If you want to use the bags of preshredded cheese that you can buy in the supermarket – then go ahead.  It’s your time, money, kitchen and recipe.  Do what’s best for you.  The reason, though, that I like to shred it myself, is because the bagged cheese will usually have an anticlumping agent in it, such as flour.  The cheese will melt but it won’t have that ooey gooey melting consistency that the fresh shredded cheese will have.  Plus, I prefer not to have added ingredients in my cheese.


See how much lighter and fluffier this cheese looks?

Next, take one of your tomatoes and core, seed and chop it and add it to your chicken mixture.  I like to use plum tomatoes here because they are meatier and have less juice and seeds then say, a beefsteak tomato.  But, if all you have on hand is a vine ripened or other tomato, then that is fine as well.  Just wing it – it’s what I always do.


Chop your cilantro and throw it in the bowl along with your minced garlic.  Cut your lime in half and juice one half of the lime into the bowl.  The recipe calls for 1 tsp but again, just juice it right in.  Don’t try squeezing the lime into a measuring spoon.  It will be a big mess – I promise you! 


Next comes a fun part.  If you have children helping you cook, this would be a good step for them.  Put the tortilla chips into a Ziploc bag and scoosh out all the air.  Seal it well.  With a rolling pin, meat tenderizer, hammer, etc., crush the chips.  This makes great use of those leftover tortilla chips that are sitting at the bottom of the bag that are basically pre-crushed for you anyway.  Check your pantry closet; you probably have a bag in there.


Add ½ of the chips to the chicken mixture and stir it up.

Next comes the “ring” part.  Don’t be scared.  It’s really quite easy.

On a large round baking stone, sheet tray, whatever you are baking with, sprinkle the rest of the crushed tortilla chips.  Like so:


Open up your 2 crescent roll dough packages and separate them into triangles.  Place one in the 12 o’clock, 3 o’clock, 6 o’clock and 9 o’clock positions.  Like so:


See – that wasn’t too bad.

Next, start to fill in your open spots 4 at a time.  Here is what it looks like:


Now, this doesn’t have to be neat or look perfect at all.  It is all going to get wrapped up into a little package anyway.  It should look like a sunburst.

Once all your crescents are laid out, press or roll them down so the dough is even.  You just want to flatten it out and adhere it all together so it will hold the filling and cook evenly.  As you can see, I used my fingertips – it’s how I do things.  The less I have to wash, the better. 


We’re almost done.  Take your chicken mixture and shlop it all into the middle of the dough.  Again, it doesn’t have to look pretty; it’s all getting folded up.  If you feel you must, you can use a large scoop and make nice little neat chicken mounds in the middle.  This is what it should look like.


Start with your points and fold them up and over the chicken mix into the middle of the ring and tuck the points under.  Like this:


Again, this doesn’t have to be neat.  It looks better when some of the chicken filling is showing.  Plus, there will not be enough to fully cover it.  This also leaves you some garnishing opportunities.

Here is what it looks like all folded up and in a neatish ring.


At this point, if you want to be creative, you can shape the ring into a heart. 
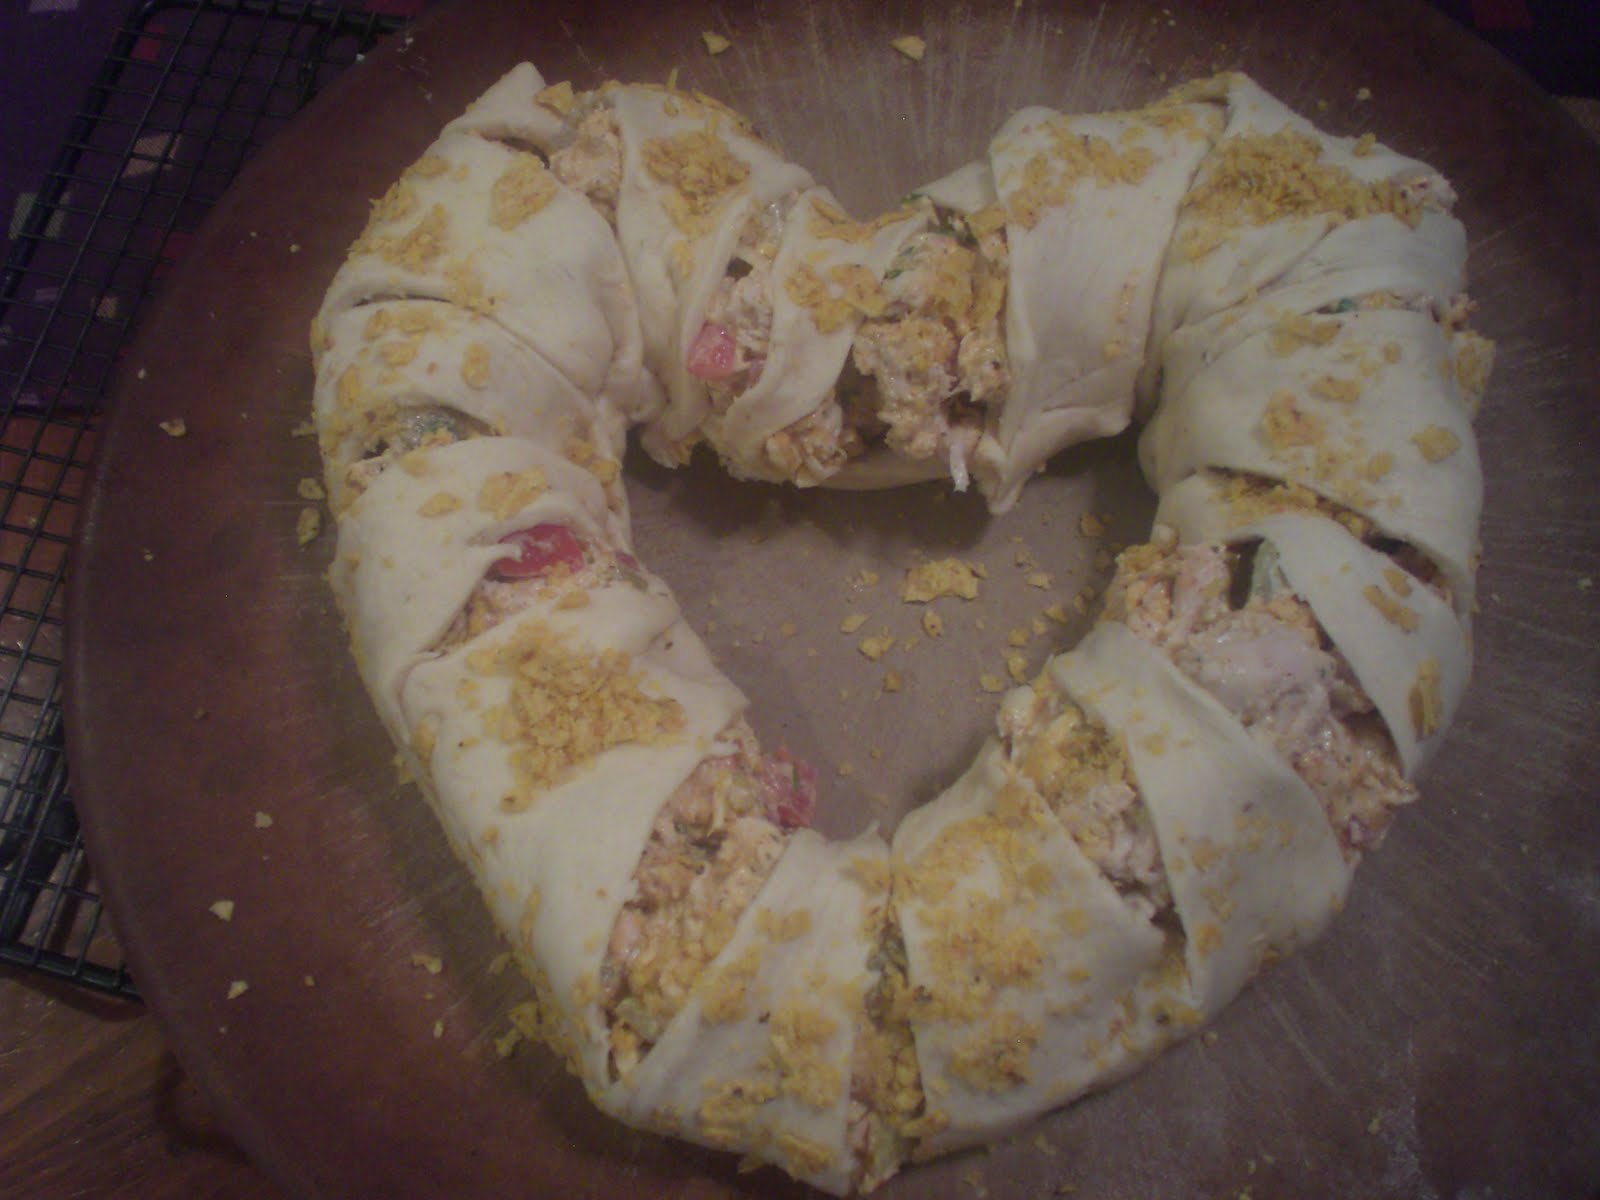


This is fun for Valentines Day or just because.  I have also done this at Halloween and make the ring into a coiled snake using olives for eyes and a roasted pepper sticking out of its mouth as a tongue.  It was kind of cool, too since the tortilla chips made the snake look like he was shedding his skin.  Appeals to the morbid/semi gross part of me.  You have to have fun with your food!

If you still have some leftover tortilla chips or there is some floating around on your baking sheet, scoop it up and sprinkle it over the top.  Put it in the oven for about 20-25 minutes or until the crescents are nicely browned.

While the chicken is in the oven, take your remaining tomato and lime half and slice them for garnish.  Like this:


When ring is done baking, garnish with the tomatoes and limes and this is what you get:


Ain’t she pretty?  Here she is all ready to serve with the sour cream and salsa in the middle.


So, next time you’re looking to “re-invent” your leftovers or make something new, give it a try.  And be sure to let me know what you did.  E-mail me with ideas, pictures, recipes; I would love to hear from you!

Oh, and since its Teacher Appreciation Week – go appreciate a teacher in some way.  I’m sure even a simple thank you note would make their day.

Monday, April 25, 2011

Split Pea Soup & Brussel Sprout Salad - what?

Split pea soup was one of those dishes I never liked.  I don't know if it was a texture thing or if it was from seeing the Exorcist one too many times but I could not stomach it.


But now..........well, obviously my tastes have changed because I would not be writing this if they hadn't.


This soup is always best when you use a leftover ham carcass from a previous meal. Of course, split pea soup can be made without it but the ham adds that nice salty, smoky richness I love. 


I'm all about the pig.


Here is what you need:


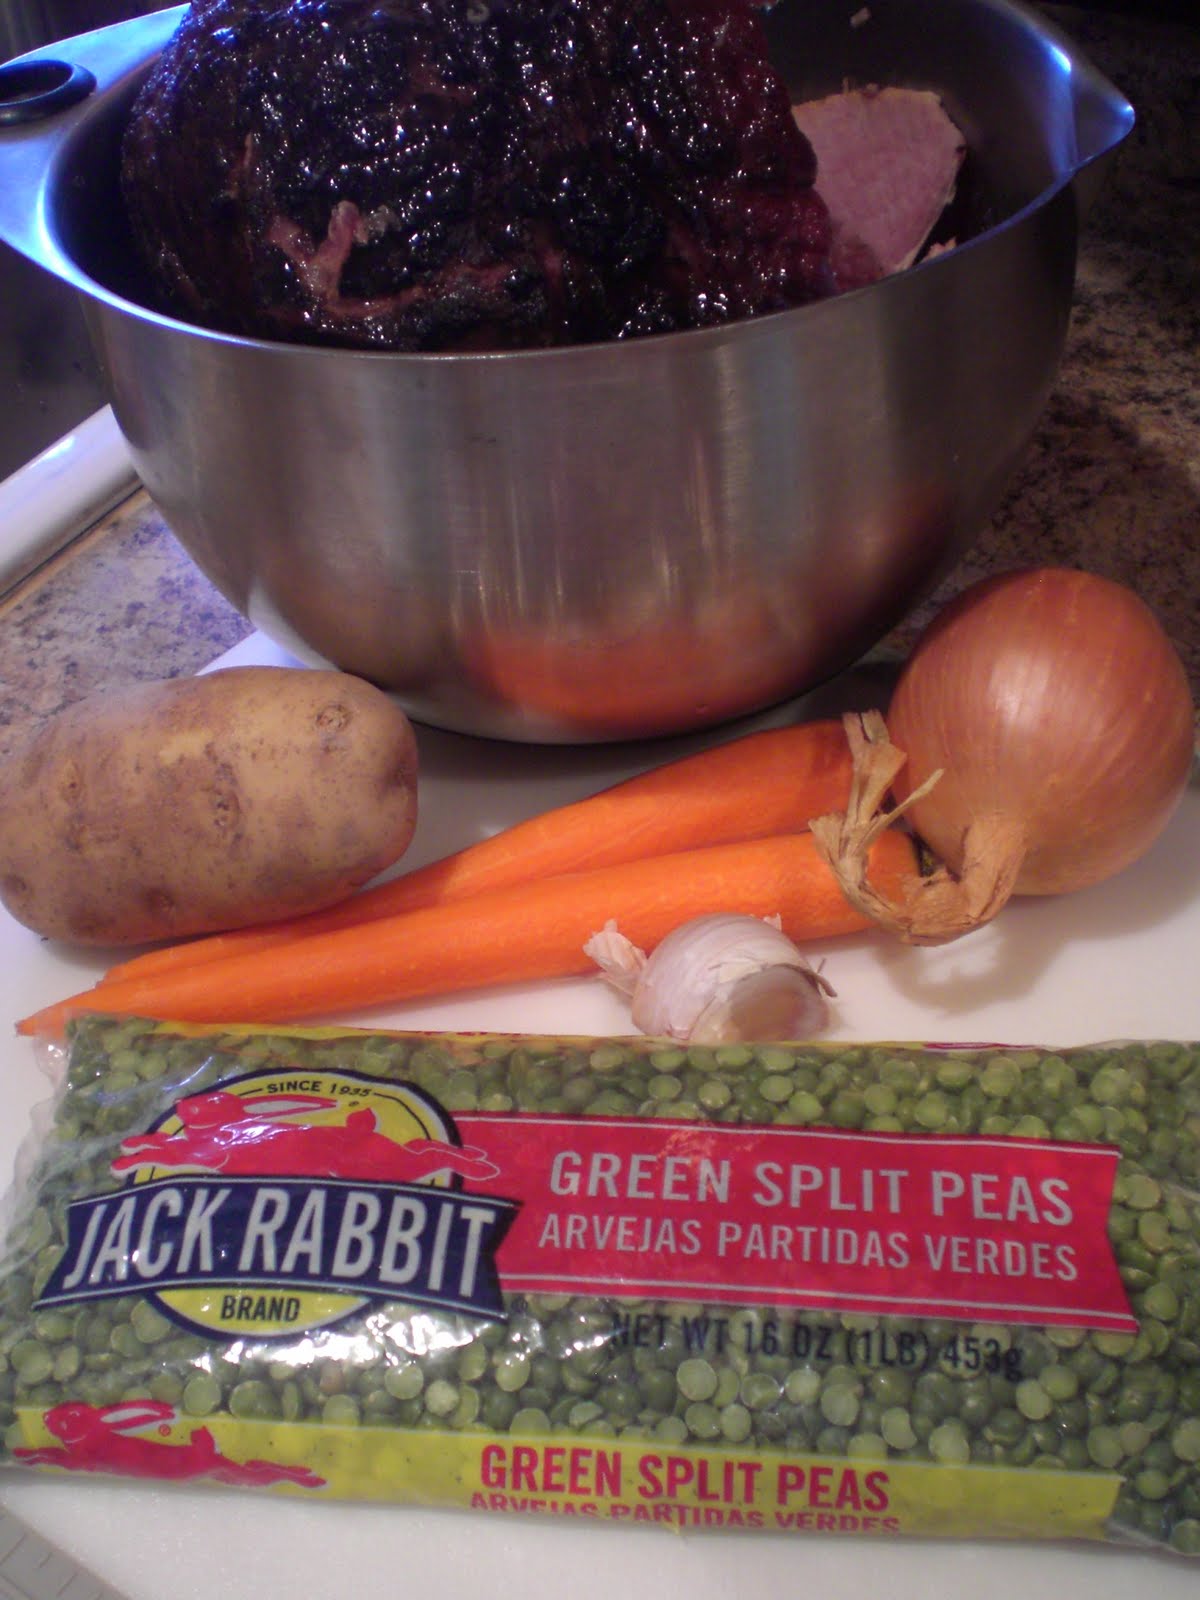
1 ham carcass - mine was the bone and etc from a spiral ham
2 Tbsp olive oil
1/2 - 1 whole peeled and diced onion
1-2 garlic cloves diced
2 carrots, peeled and diced
1 russet potato, peeled and diced
1 package of dried green peas
7 cups water
1/2 cup heavy cream
hot sauce (optional)
diced ham (optional)
sour cream (optional)


Here is what you do:


On a large cutting board, peel and dice your garlic, onion, carrot and potato. 


In a large soup pot, heat the 2 Tbsp olive oil.  Add all your veggies and cook approximately 3 minutes or until onions start to become slightly translucent.  No need to get too crazy here - you will be cooking the soup for awhile so all of your vegetables will heat through.


Meanwhile, in a small colander, rinse and drain the peas.  Remove any peas that don't look good - ie - brown/cracked/just don't look right.


Add the peas, ham bone and 7 cups of water to the pot.  Lower heat to a simmer and cook approximately 1 1/2 hours.


Remove the ham bone.  If there is any meat left on the bone that is still salvageable, slice it off and , dice it and reserve on the side until soup is finished cooking.


Taste the soup at this point to adjust the seasoning.  You may need to add a little salt depending on how salty or not salty the ham is.  I always add some pepper and 3-4 dashes of hot sauce to give it a little something something.


Now, you have two options at this point. (1) Leave the soup as is  or (2) Puree the soup
I like to do a little of both.  I guess that would be option (3). 


Like I said before, I have texture issues.  I'm also not a big fan of pureed soups.  I need to chew my food - even if it is soup.  I take a potato masher and slightly mash some of the peas, potatoes, etc together to make the soup a little thicker. Not mashed completely mind you.  Just a little - maybe half of the veggies so you can still see chunks.  You can also use a handheld immersion blender if you have one and feel like washing another tool. For me, the potato masher is how I roll.


Now that you have mashed your veggies - or not - it is time to add the 1/2 cup of heavy cream and heat until soup comes to a slight simmer and thickens.  I think this step adds a certain amount of creaminess and richness, but, if you choose, you can leave the cream out. 


Now it is time to serve it up.


I like to add a little dollop of sour cream at the end and a little sprinkling of diced ham. 


And there you have it!  See those chunks of carrot and ham floating around?


Yum yum super yum!


Couple notes -


If you do not have a leftover ham bone you can still make this soup.  Substitue chicken broth for the water to give it some extra flavor, throw in some ham pieces or even some cooked bacon. 


If you are a vegetarian, eliminate the meat and substitute a good vegetable broth for the water.


You can add some additional vegetables like celery or peppers.  To make it thicker, throw in another potato or two.  You can also add some chopped jalapeno to make it a little spicier. 


Remember, it's your kitchen.  Everyone has different tastes, likes and dislikes.  Make it your own.


But try it - you'll like it!  Don't I sound like a Mom? 


Oh, and speaking of trying something that maybe you might not have liked before.  Here is what I had for lunch today...............


That would be a cold brussel sprout salad with dried cranberries and diced ham in a sweet vinaigrette topped with Manchego cheese.


Holy!! 


Whoever thought of having brussel sprouts - not cooked and in a salad?  It's a whole 'nother ball game my friend.  The brussel sprouts are nice and crunchy and not nearly as bitter as when they are cooked.


If you are feeling super adventurous but aren't "feeling" the pea soup, give this one a whirl................


 2 containers Brussels Sprouts - about 1/2 pound - stems cut off and leaves pulled apart
1/4 cup dried cranberries or your choice of dried fruit
1/2 to 3/4 ounce of Manchego* cheese


1 cup extra virgin olive oil
1 Tablespoon Agave Nectar* or honey
3 Tablespoons red wine vinegar (or your choice of vinegar)
1/4 teaspoon lemon zest
2 teaspoons fresh lemon juice
1 garlice clove minced
1 teaspoon stone ground mustard
salt &pepper to taste

In a large bowl, mix together the brussel sprout leaves, cranberries and about 1/2 of the manchego cheese.  I like to shave the cheese with a vegetable peeler so they are in long thin slices. 

For the dressing - whisk together the agave nectar, vinegar, lemon juice, lemon zest, mustard and garlic clove.  Slowly whisk in olive oil just until combined.  Adjust to your taste with salt and pepper. 

Toss salad with some dressing and enjoy!

As always - couple side notes:

You may not need all of the dressing so it can be stored in the refrigerator for about a week.

I added some diced ham since it was leftover from Easter.  I'm all about using up the leftovers!  I also threw in a handful of dried cherries since they were on hand. Otherwise, some sliced onion or toasted nuts would be great tossed in as well.

*Like I said above, the agave nectar can be substituted with honey.  I love to use agave (pronounced ah-GAH-vae by the way).  It is a natural sweetener. And, agave is the plant from which tequila is made.  How can you not love it?!  It's a wonderful ingredient.  It adds just enough sweetness without giving you that aftertaste that honey can leave behind.  The nice thing, too, is that it is pretty readily available now in most markets.  

*Manchego cheese is a Spanish sheep's milk cheese.  It is wonderful!  I used one that was aged 6 months, but you can use a 12 month for a stronger flavor. If you do not have Manchego, you can substitute a Pecoricno Romano.


I encourage you to get out there and try something new - or revisit a dish that you never used to like - maybe you will surprise yourself.  Maybe you have had all of the ingredients listed here but if not, vow to try at least one new thing, like the agave nectar or the Manchego cheese.  Variety is the spice of life.  You never know what you might be missing!